Tuesday, 29 September 2020

How to Buy a Custom Glass Countertop piece for your home

This blog is an extract of a well-written piece on Christie’s (The Auction House) website. It has interesting guidelines that will assist you when commissioning a custom piece for your home or business. I have added commentary to make it particularly helpful for buyers of custom glass countertops.

  1. Trust your instinct

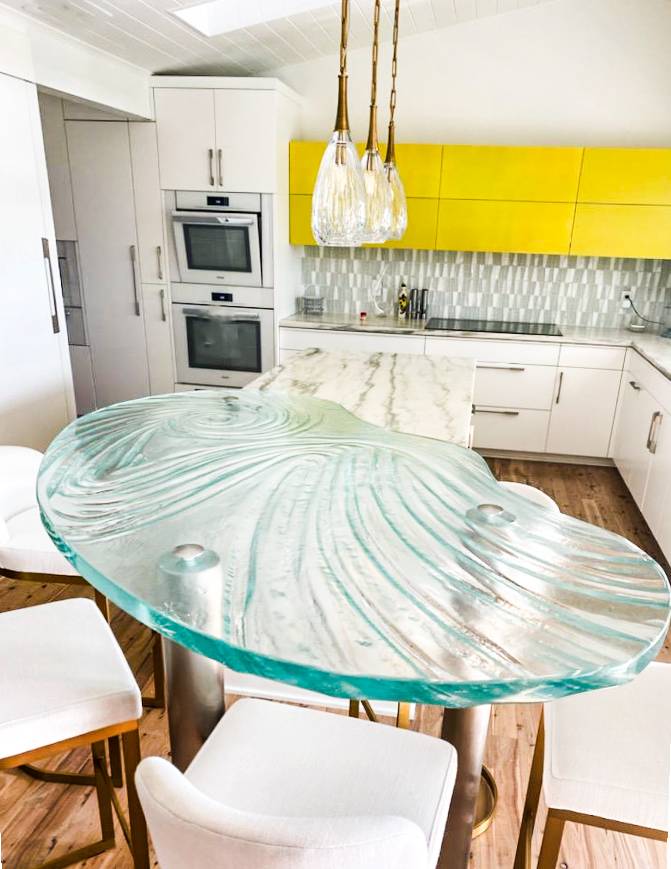
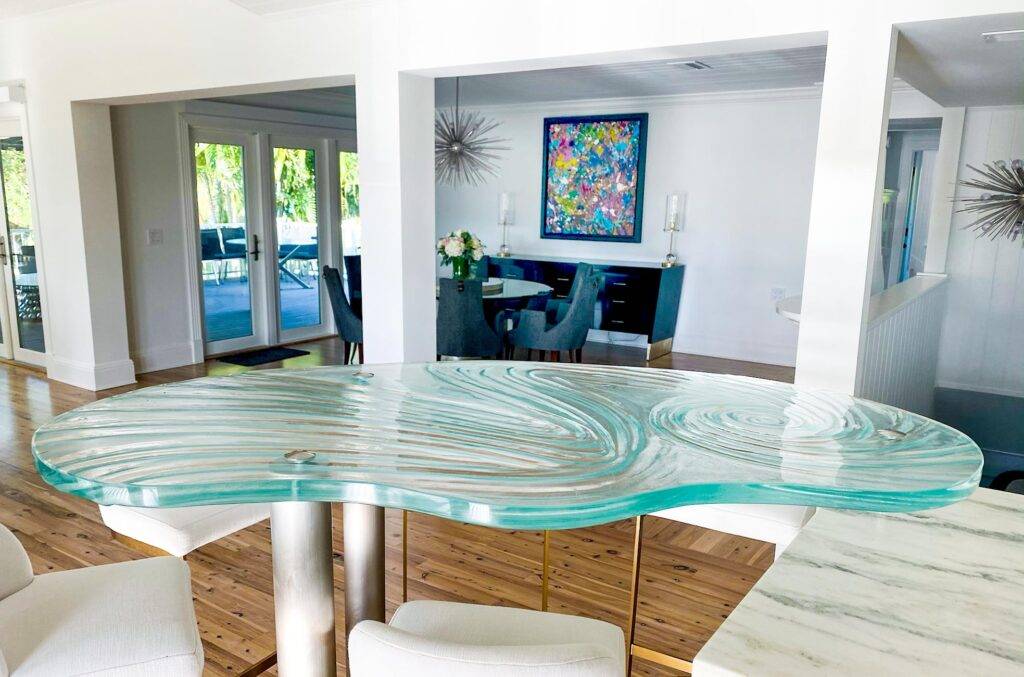
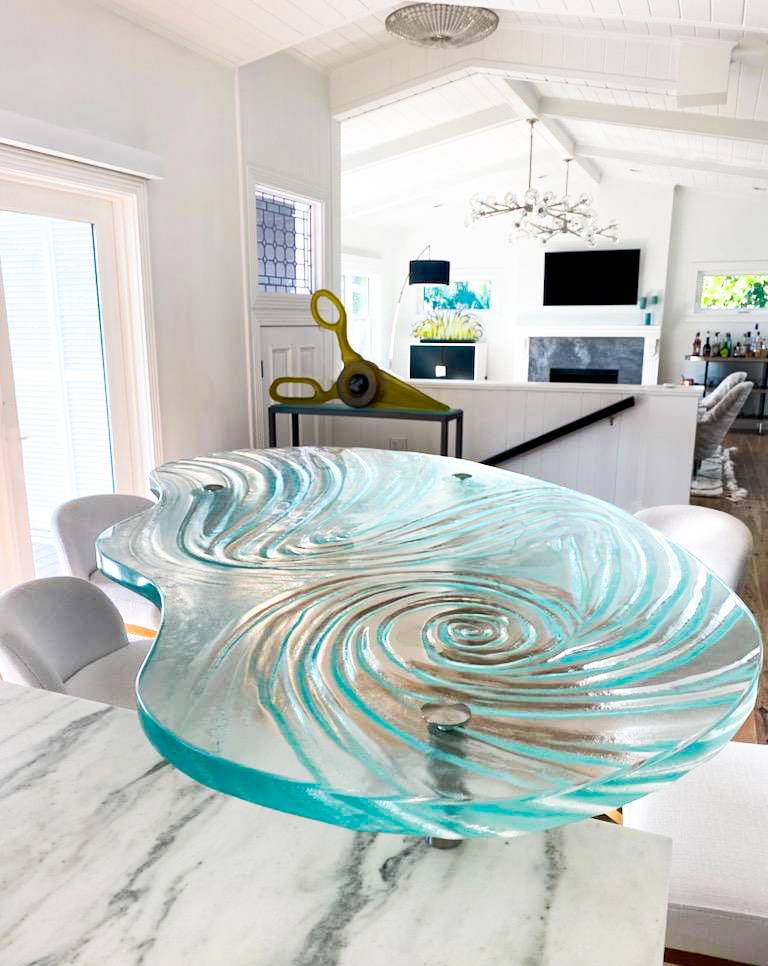
If a thing touches me, intrigues me, or fits my style, I am drawn to them. Trust your eye. You already know much more than you realise about what you like or don’t like, whether something feels and looks well made, whether you actually love it. Especially important when deciding upon the highest-value surface that will attract the most use, each day, all day. We can show you ways to pair a Glass high bar that is very fun (especially at night) with e.g. White Glass that looks very elegant…but at ⅓ the cost per sq ft on average. We recently documented a long-distance relationship with a couple in Scottsdale, Az. It was clear we were on the exact same page from the get-go, and it set the table for a beautifully designed and furnished modern kitchen remodel.

  1. Develop your knowledge

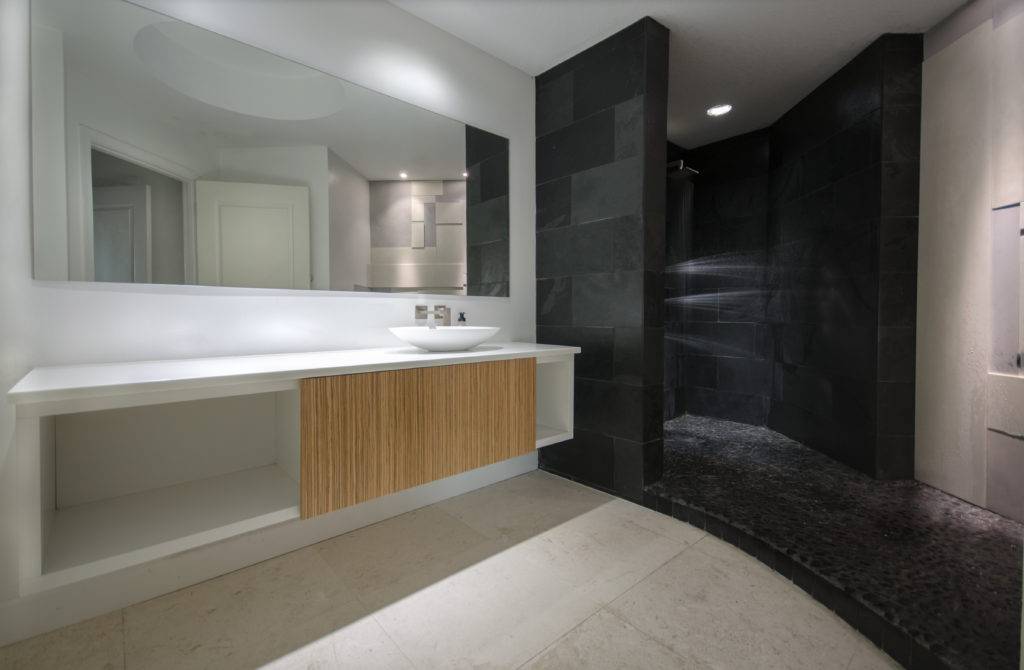
Go to craft fairs, meet makers and look at their work. Very good advice. We have invested in a fully outfitted Glass Design Center in Tampa, FL. Please visit. Please see what the experience is like. We are happy to serve wine to insure an authentic evening experience bathed in the ambiance of our gorgeous illuminated high bar. 

  1. Buy something you need

A good place to start is with something you use every day. Why go to Home Depot for countertops when you can meet someone who actually makes them from scratch and start a friendship?  When you’ve built up your confidence, you can commission something.

  1. Take a leap of faith

Familiarise yourself with a maker’s style. If you love it and ask for something in the same style you can’t go far wrong. If you see something you like ask if the maker would consider doing something especially for you. You can be specific on certain details, such as height and colour, but you need to factor some quirkiness in. Some artistic processes like making glass are a bit unpredictable. But that’s all part of the charm, the individual personality of a piece.

  1. Certain things are worth paying for

Some people have the idea that hand-made is not well made and will not last, but I think the opposite. Modern makers are highly trained and create high-quality pieces with high-quality materials. By buying from them you also support the artists so they develop their skill. Bespoke doesn’t have to cost an arm and a leg, but commissioned art is about making a connection with both the person that makes it and the object itself, and that is priceless. You might also be buying or commissioning something that will appreciate in value.  Artists note: Probably only after Im 6 ft under…

  1. Be patient

Things may take several weeks to make depending upon the scale of the project. They’re worth it.

  1. Enjoy the process

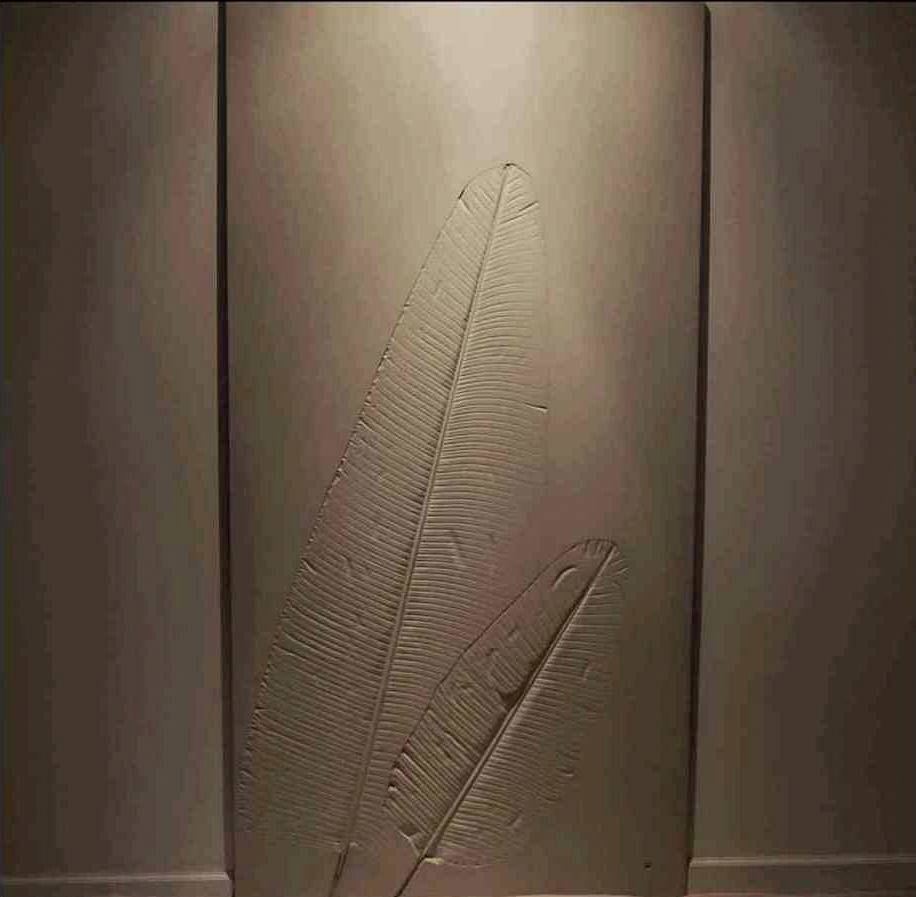
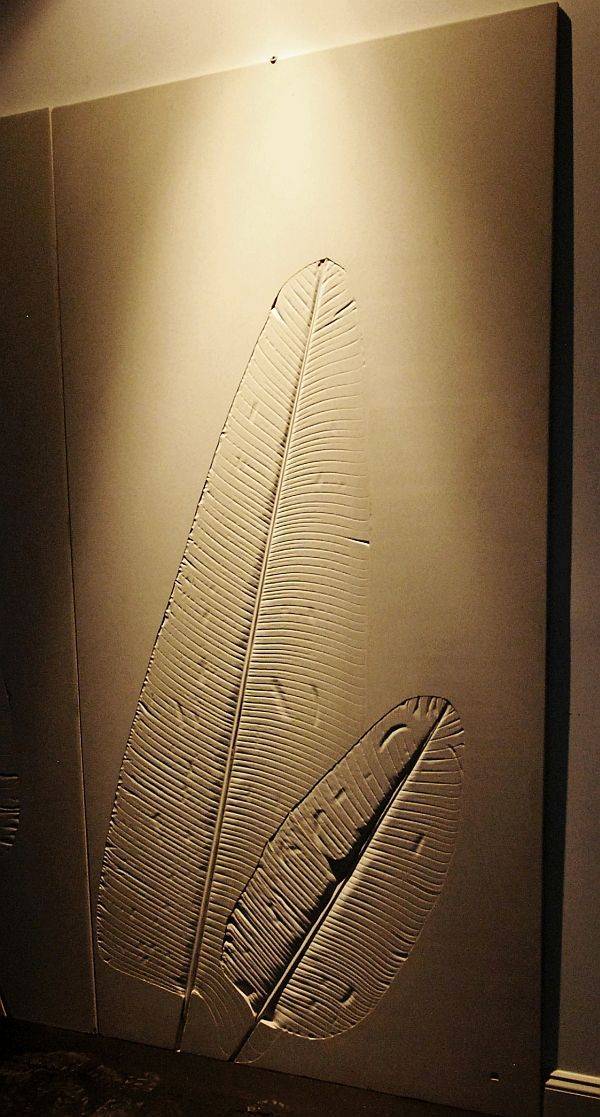
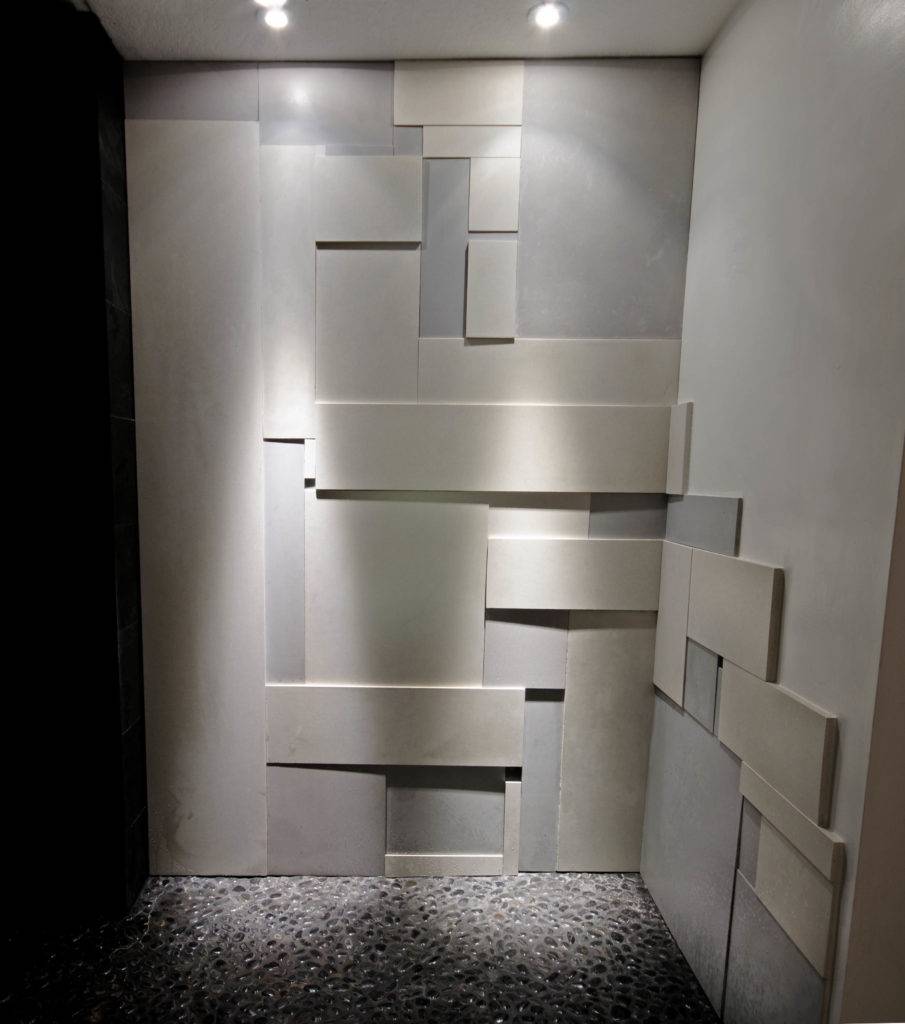
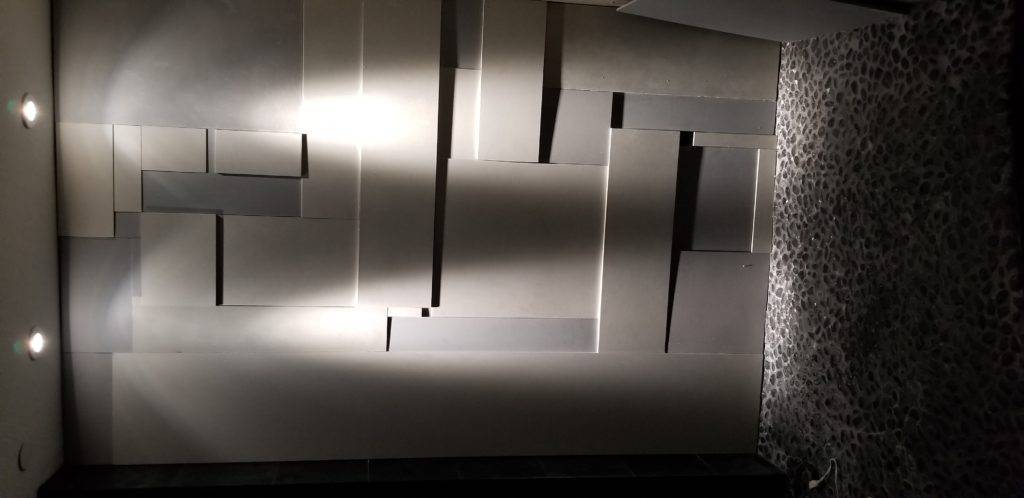
Artisans are intelligent, approachable, sympathetic and creative. People who work with their hands have empathy and compassion. They have created an artistic bubble that is beautiful and purposeful, and by buying and commissioning their work you can be part of it. These things will enrich your life. See examples of our work here.

We are always ready to serve you. Give us a call…lets discuss your ideas…see where it goes.

Jeff Downing

(813) 784 5211

Jeff@DowningDesigns.com

The post How to Buy a Custom Glass Countertop piece for your home appeared first on Downing Designs.


source https://downingdesigns.com/how-to-buy-a-custom-glass-countertop-piece-for-your-home/

Custom Glass for a Kitchen Island in Clearwater, FL…a very interesting case study

We love clients that bring us their creative ideas and engage us to bring their custom Custom Kitchen Island glass high bar to life.

Freida was one such client. She had a very defined idea about an organic shape and the way the textural flow should flow inside the piece. We digitized her sketch and waterjetted her outline exactly as she wanted…in cardboard first. This cutout was placed in our kiln sand bed where we scribed the outline. The texture for this piece was done in her presence, and after much give and take we were satisfied with the texture for this unusual piece.

The 1.5” thick glass top was fused and annealed in our oven for 5 days. We then took the template and placed it atop the oversized fused glass, and scribed exactly where the waterjet would cut. We then hand-polished the curvaceous edge to perfect optical clarity with a soft roundover all around. No CNC machine can equal the quality of hand-polishing…especially with textured glass. The resulting edge allows the client to peer inside the glass…it is magnified, and an exceptionally interesting view to behold.

The plan called for a three-legged support system, partially atop her kitchen island to a height of 42”.

We had our stainless steel fabricator create (2) 3.5” diameter steel tubes that were 40” tall, and (1) that is 4” tall. Upon these the glass would be secured. Three holes were waterjetted in the glass high bar for the Low-Profile Stainless Caps. The long posts were ruggedly secured to the floor, and the short leg through the island countertop. 

Carefully shooting the floor with our laser-level made short work of a complex 3-D siting. 

The glass was set in place. The result was magnificent. Soon after it was set, the sunshine beamed through her window and illuminated the glass in an exceptionally beautiful and unexpected way. Quite a stirring moment indeed.

We have attached a few pictures of this dramatic piece.

Glass Island High Bar Florida

Glass Island High Bar

Glass Countertop custom

Glass Island High Bar in Clearwater Florida

Glass Island High Bar in Clearwater Florida

Kitchen Glass Island High Bar in Clearwater Florida


We would like to thank Freida for her insight into creating this unique piece as well as her photographs after the rest of the kitchen was finished.

Give us a call to discuss your creative ideas and let us help you create your glass showpiece.

Jeff Downing

Jeff@DowningDesigns.com

(813) 784 5211

The post Custom Glass for a Kitchen Island in Clearwater, FL…a very interesting case study appeared first on Downing Designs.


source https://downingdesigns.com/custom-glass-for-a-kitchen-island-in-clearwater-fl-a-very-interesting-case-study/

Monday, 28 September 2020

Shipping Large Glass Countertops across the USA


Shipping large Glass Countertops across the USA and Caribbean requires expert crating and thoughtful installation technique. Downing Designs crates, ships and insures our shipments of custom Glass Countertops anywhere.


In shipping glass countertops and glass sinks, our experience has taught us:

  • Template and Install of Glass Countertops by the same crew is smart
  • Overbuild crates
  • Insure properly
  • Plan well ahead for logistics at the delivery site.


Recently, we had an interesting experience in Scottsdale, AZ with Our clients Steve and Celia. Our offer to them for White Glass and Textured Glass countertops was accepted and we discussed arrangements for a template visit for measurements and layout planning.

This project reinforced the need to have 1 person in charge of template, fabrication and delivery, as their kitchen cabinet personnel were unwilling to be part of the risk chain should there be an issue if pieces do not fit correctly. You are going to pay someone to install and template countertops anyways…might as well be the same one making them. Downing Designs is unique in the ability to serve far reaching clients to inspire a professional result from start to finish. This was covered in an earlier blog Glass Countertop Buying Guide.

There is another advantage. When visiting the jobsite, we can get a feel for the “flow” of the room and create our texture in sync with that flow. This is not something to be taken lightly. Glass Countertops will last a lifetime. They are expensive. Like buying a piece of art, make sure that it is exactly what you want. Regret is a hard thing to live with forever. Leaving installations to amatuers also risks much, as the installation of these counters must be handled very carefully.


Upon installation trip #1, one of the two crates was badly damaged, and laying on its side in the delivery truck. So much for our prominent “THIS SIDE UP” stickers.


We installed what we could, and photo-documented the rest for the ensuing insurance claim.

Claims can take several weeks to process, but no need to wait for that. We re-fabricated and again shipped the needed pieces. Crate #2 arrived intact. Installation trip #2 was planned and, and the resulting installation went smoothly.

Kitchen Island Glass High Bar

Kitchen Island Glass High Bar

Many thanks to Steve and Celia …happy we were able to get these installed before your big event. We like to say “Nice things happen to nice people”…and their genuine friendliness and hospitality made this trip a very memorable and pleasurable one. 

The post Shipping Large Glass Countertops across the USA appeared first on Downing Designs.


source https://downingdesigns.com/shipping-large-glass-countertops-across-the-usa/

Tuesday, 15 September 2020

Glass Countertop Kitchen High Bar Design Considerations

When creating Glass Countertop Kitchen High Bars, there are no “standard”  rules to follow, but in our experience there are a few common-sense approaches that yield great results.

No kitchen shape is “standard”, therefore we have to be smart and creative to maximize the utility, beauty and safety of a glass countertop high bar over a kitchen island. We have done hundreds of these installations over the years, and wish to help you prepare for yours.

Intelligent design starts by observing and taking inventory of the physical constraints we have In the kitchen:

  • Faucets, Sinks, Stoves in the lower countertop
  • Clearances for Refrigerator doors, ADA access, Space to walk around the bar
  • Cabinet box layout
  • Glass High Bar length and # of people to be seated at the bar, 
  • Strength of lower countertop materials (fragile or strong).

Make sure you have clearance for all of these elements and that they are not in conflict for where the glass high bar will reside. When we tell our clients that all quotes start with a sketch and a photo, it is simply because we want to ensure that we have accounted for these potential conflicts. Having a strong lower countertop material is critical as we cannot have a ~350lb glass high bar on 2 supports with a weak substrate like marble or onyx. It could fracture.

Cabinets usually come in 24” deep boxes. If you are designing a kitchen island with a sink, these are not deep enough for a high bar and a typically 20″ deep sink. You will have to augment your island base cabinets to be ~36” wide. This does not need to be expensive.

In the Downing Designs Glass Design Center, we solved that problem by adding a box made of 2×12 wood and fastened it to the cabinet. This allowed for our sink, faucets and elevated bar top  to peacefully coexist. It is very strong as well as inexpensive to make. We covered the back of it with door-skin plywood, painted and trimmed it. Simple, Perfect, Elegant solution.

Case Study

Our client Dany wanted a Glass High Bar atop his kitchen island. He initially desired an “L” shape. We quoted him both a simple linear shape as well as his “L” shape, and told him when we meet, we can decide the best path forward. Upon our initial site visit, we discussed all of the options above, and given his needs and the layout of the aforementioned elements, I campaigned against the more expensive “L” design because:

  • it added very little seating room
  • It added a lot more to the cost
  • It detracted from the linear flow of the kitchen

How to Size a Glass Countertop Kitchen High Bar.

How best to end the glass high bar (overhangs, symmetrical or asymmetrical with the lower kitchen island countertop?). Most high bars we sell are 20” wide. 10” overhang is perfect for most situations. This means that 10” will be “inboard”.

Glass High bar dimensions

Glass High bar dimensions

Our design methodology starts by simply walking around the kitchen several times and looking at it from all angles…observing the other physical elements in the room…cabinets, perimeter countertops, doors, windows, hallway openings, couches, etc.

Making our bar optically “co-linear” with these elements is a good place to start.

Start by focusing on one overhang at a time. In this case on the left side, it was easy to have a minimal overhang that lined up with the distant perimeter countertop and upper cabinet lines. The refrigerator underneath that end of the bar demanded easy access. We visually confirmed this by placing our template strips to align with those distant elements.

Now to overhang #2. Here we had a lot of room to play on the right side. Off in the distance, the upper cabinets presented themselves as a logical extension that led our eye right to it. We approximated the overhang to be in line with that cabinet and placed our template strips to align with them.

Now, we walk around several times to ensure the “feel” and sizing is correct. Make sure there is clearance for people, chairs, etc. Make slight adjustments…compare before/after. This is a simple, yet often overlooked way to make your Glass Countertop High Bar feel right at home by syncing with the other design elements in the kitchen.

Designing a Texture for Glass High Bar.

Once we have a final size, we can start designing the texture of the glass. 

All rooms have a voice that will “speak” to us and we “listen” for what the personality of the room says to us. From there we can compose a proper Glass High bar layout whose textures flow perfectly within the space it will reside. This is a critical distinction for a custom Glass High Bar vs a prefabricated glass slab. Its like the difference between a custom fitted suit that matches every contour of your body, vs a plastic poncho worn at a rainy football game. 

Knowing where the supports will reside is critical, and we try to flatten those areas to allow for our custom cantilevering supports. We like to place our supports approx 16-32” inboard from each end of a glass high bar. Not many materials to allow cantilevering of 32″ lengths. Our Glass Design Center at Downing Designs has a 37” cantilever off of one end of our glass high bar.

Dazzling Glass Countertop High bar at Downing Designs in Tampa,FL:

Dazzling Glass Countertop High bar at Downing Designs in Tampa,FL:

Selecting this placement is critical since the supports are to be through-drilled to the lower countertop. We must have clearance underneath to attach the glass high bar supports with washer/nuts onto the through-rod. Having knowledge of where the cabinet boxes are is essential. A drawing is a must. 

Interactive Texturing Kiln with Client

We want to enhance the flow of the kitchen and make it become the focal point of the room. 

It’s going to be a centerpiece so it must be as Artful as possible, while ensuring that the design pleases the client. We invite participation directly in this process.

In this case, Danys daughter Chloe, is very artistic and we agreed to have her work with us to create the texture…first on paper, then in the kiln sand bed. We held a little family contest, where everyone was invited to participate. We then took the best of these and refined further into THE ONE.

Texturing Custom Glass Countertops at Downing Designs

Texturing Custom Glass Countertops at Downing Designs

From an Artists standpoint, knowing when you are done is the hardest thing to discern on the fly. We have to STOP somewhere…and often LESS IS MORE in terms of detail. We find that our favorite textures are big arcing textures that really extend the room with their graceful flows. 

Scaling our drawing into the kiln sand bed is a fun process.

Chloe did great and had great ideas with respect to the balance of the composition.

Texture for Glass Countertop

Texture for Glass Countertop

The post Glass Countertop Kitchen High Bar Design Considerations appeared first on Downing Designs.


source https://downingdesigns.com/glass-countertop-kitchen-high-bar-design-considerations/

Saturday, 30 May 2020

Modern Kitchen and Bath Design with Floating Cabinets Make Small Spaces Appear Larger.

If you are remodeling your kitchen or bath cabinets, one of the options you have is to float your cabinets off of the floor.

There are many advantages to floating your cabinets. The largest advantage is to increase the visual feel of the volume of space of the kitchen or bath. This benefit is particularly pronounced in small to medium kitchen or bath spaces where every inch matters, and the visual reward can be tremendous.

This is a 3-Dimensional equation, and must be thought through in 3-D fashion to enjoy the benefits of floating cabinets. 

We think about gaining volume for your room in many ways:

Volume below the cabinets. 

Volume above the cabinets. 

Volume in front of the cabinets.

Volume under high bars.

Volume under sinks.

Your eye can be led under and over the kitchen or bath cabinets and in doing so makes the room appear bigger. The ability of your eye to see the base moulding trim as a continuum has an enormous impact on how you perceive the space. It opens it up. Most kitchen or bath cabinets have a 5” toe kick before the actual cabinet space starts above the toe kick. By floating kitchen cabinets e.g. 10” above the floor you only compromise your storage space by 5”. The visual difference is much greater than that 5”.

This is also true of upper cabinets. By leaving room above your cabinets instead of going all the way to the ceiling once again the visual trick is intact, and creates the feel of a much bigger room. The continuous flow of crown moulding appears much cleaner to the eye…and the illusion is complete. Its a cleaner and more modern kitchen and bath look.

Upper kitchen cabinets typically are useful only up to about 7.5’ above the floor…above that  most people can’t reach without a chair.

We dare ask the question…is all that cabinet volume necessary?

Only 1 way to find out, and that is to empirically measure the volume of your “stuff”…pots, pans, dishes, glasses, etc. It’s never a bad exercise to have an annual exercise to donate excess/unused items to charity, be it from your clothes, your garage or your kitchen cabinets.

Donate pans and pots and dishes and glasses that you have not used that are just collecting dust and taking up space, and causing you to think you need more cabinet volume than is required.

In this fashion you’ll have better access and more efficient storage for that which remains.

Downing Designs showroom has floating cabinets, floating sinks and floating Glass Countertop High bars… Do you see a theme here? We have seen far too many kitchens and baths where HEAVY feeling cabinets are unnecessarily installed everywhere and this visually repels our eye. 

By taking away “heavy” looking elements that take up space i.e. full length kitchen cabinets, full vanity cabinets, and knee walls for hi bars we open up the visual space. 

Adding pure White Glass Countertops adds to the visual expansion as well.

When you look at our small showroom it has a much larger feel. It has White Glass Countertops on its periphery to make this small space feel more spacious. And that’s exactly the idea we want to reflect.

Our Glass Countertop High Bar also adds to the floating feel and is amazing. It floats atop (2) custom metal brackets that hide the LED supply cord internally and is 127” x 20”. Had we used a knee wall, it would have divided the room visually. This design has a very modern, airy feel and is great fun to be seated at that high bar with a glass of wine.

Our Glass Sinks are floated as well. Not only is it a clean look that allows beautiful downlighting of the glass pattern onto the floor, but it also serves as ADA ready sink. This is typically important in restaurants where bathroom space is precious and owners want 1 beautiful, universal sink design to serve handicap [patrons and non-handicap patrons alike.

Further, it appears we are all getting older each day. Designing for the day when we may be wheelchair-bound is never a bad idea. Do it once…do it right…do it so it will be practical well into the future.

The best part about this minimalist style of floating cabinets, floating sinks and floating High bars is that it actually costs less.

We are huge proponents of minimizing the amount of upper cabinets that you buy at the start of your project… You can always add more cabinets if you feel the need.

We like to say design for the 99% not the 1%. This means that don’t design for the annual Thanksgiving dinner, but rather design for everyday use… which may be one, two or three people.

The depth of your cabinets also can be customized to suit your space. For example, you wouldn’t use 24” deep cabinets in small bathrooms because it takes up too much room. The same thinking can be true in the kitchen or any room. Visualize what a skinnier cabinet can do for the living space.

Good cabinet fabricators can make your cabinets any depth you specify. Again by keeping the visual space open and floated with a minimalist cabinet design you free up the visual space in your kitchen or bath.

Take a look at some of the following pictures. Each of them offer some interesting insight into the value of floating kitchen or bath cabinets.

Thoughtful space planning will pay dividends for you during your stay in your home or condo, and will also pay dividends at resale time.

Think about this…Let’s say that you’re in a condominium or in a development where floor plans are very similar, if not identical. If two houses possess an identical square footage and are on the market for identical prices, the one that feels bigger and more contemporary will always get the bid.

Something to consider when planning your next kitchen or bath remodel.

Give us a call to discuss how floating your kitchen or bath cabinets can achieve great results for you as well.

Jeff Downing

Jeff@DowningDesigns.com

(813) 784 5211

The post Modern Kitchen and Bath Design with Floating Cabinets Make Small Spaces Appear Larger. appeared first on Downing Designs.


source https://downingdesigns.com/modern-kitchen-and-bath-design-with-floating-cabinets-make-small-spaces-appear-larger/

Thursday, 7 May 2020

Concrete Wall Tiles, Custom, Large Format

Producing large custom concrete wall tiles can be very rewarding. These tiles can be assembled indoors or out, and have an infinite range of color-matching possibilities. Creative possibilities for incorporating custom relief molds of Leafs, Wood, etc can yield amazing results, especially when downlit with our simple lighting system described at  the end of this blog.

Large format concrete tiles as thin as 1/4”  can be fabricated in any shape desired. They are excellent  for bathrooms, living rooms, and outdoor walls  and can be waterproofed. Several examples below show the versatility and creativity possible with concrete wall tiles. 

Concrete Wall Tile Leaf Mold

Large format Leaf castings of Palm leafs, made at Downing Designs shows how beautiful these castings can become. This mold is 9 feet tall and 5 feet wide  and ¾” inch deep. It only weighs 450lbs…pretty light vs the HUGE concrete countertops and concrete sinks we make that are often 800lbs+.

Notice how acute spot lighting from above really highlights the rib structure…closer examination of the overlapping areas shows us that both leafs’ ribs transmit through onto the concrete and are revealed in great detail this is a beautiful calm piece.

Concrete Wall Tile leaf casting

Concrete Wall Tile leaf casting

Concrete Wall Tile leaf casting

Concrete Wall Tile leaf casting dramatic lighting

Mondrian Wall Tile Mosaics

Taking inspiration from the artist Piet Mondrian we produced a series of residential installations one in the living room, one in the bathroom. By using different thickness concrete wall tile with varying colors mixed and matched it produced a Mondrian like Mosaic in very large format. Installation is simple and could have been done by any competent wall tile installer.  Once again, down lighting from the ceiling dramatized the differences in wall tile thicknesses and really makes an artistic statement in both rooms. 

Concrete Wall Tile Large Mondrian

Concrete Wall Tile Large Custom: Mondrian

Bath with concrete Wall tile shower ala Mondrian

Bath with concrete Wall tile shower ala Mondrian

Bath with concrete Wall tile with 10 degree spotlights

Bath with concrete Wall tile with 10 degree spotlights

Contemporary Bath with concrete Wall tile shower

Contemporary Bath with concrete Wall tile shower

Custom Concrete Wall Tile 

We can piece together a mosaic plan scale model for you that sketches out the possibilities and shows you what the final product would look like. 

Any color is possible with concrete wall tiles. We can match any color you desire from a Benjamin Moore color deck or color swatch you send to us.

Concrete is an excellent material to use Outdoors since it is immune to UV light and harsh hot/cold weather. Concrete roofing tiles will last 100’s of years. Take a look at the structure of the Sunshine Skyway Bridge and you will note that it’s caissons are concrete. The pigments we use are battle-tested from decades of concrete roof tiles where they have survived UV light, hard freezing conditions, and acidic droppings from animals.

Our favorite wall washing Spotlight combination is described below it is very inexpensive to achieve an amazing effect and we strongly recommend you look at these materials

3”  Recessed Ceiling mount gimble light

Ceiling Lighting fro concrete wall tiles

Ceiling Lighting

Its $11.00  Its wet rated. Its well-made (I have 5 of these in my home). Makes positioning of the light wash easy.

The bulbs we recommend for dramatic lighting are SORAA…either 10degree tight spotlights or 25 degree narrow spotlights. These are less than $30.

Each fixture costs you ~$40…and they are simple to wire in concert to achieve the desired effect. Not sure where to place these???  Duct tape one of these fixtures properly wired to an extension cord to an 8’ 2”x2” wood stick and hold it close to the ceiling and watch the effect. Mark the spot and cut your ceiling. Simple. 

The post Concrete Wall Tiles, Custom, Large Format appeared first on Downing Designs.


source https://downingdesigns.com/custom-concrete-large-format-wall-tiles/

Tuesday, 5 May 2020

Making Original Textured Glass Countertops a Case Study: Eric and Kelly

We solve a big problem for our high-end residential and commercial Textured Glass Countertop clients. Many are only interested in original works of art for their homes …not reprints or copies. They have creative ideas and want them expressed in their decor…right down to the level of details in their glass countertop texture.

Our high-quality glass countertops are too expensive to not have fun shopping for! 

This blog is one of several case studies presented to help you understand how our clients creative input drives the design process at Downing Designs.

Background

Eric and Kelly D. were designing their cute Tampa pool home to reflect their Key West taste. Kelly has an exceptional eye for landscape design, and has meticulously planned and executed by Eric. The effect is at once perfectly calming and vibrant in its color and textural composition. The next step was to make an outdoor bar that fulfilled their intent. They wanted a luminous party bar. One that synced with the flow of the outdoor walkways and layouts. They were concerned that no texture would capture the flow she envisioned.

The Lady gets what she wants. Pretty simple. We met onsite with their GC, and discussed several options incorporating her design ideas. And produced a few initial sketches.

They visited our studio where we discussed our design process. It is straightforward, but requires understanding how we feel about the flow of our textured glass countertops. The Downing Designs design center was designed for just this approach. As we walk around our textured glass high bar, different aspects become apparent: the flow looks different from one end vs the opposite end…the edge is amazing and we show how different textures that dissect the edge vs parallel the edge look like. Armed with this insight into our design process,  the design became formalized in a series of refined pencil sketches, that captured the simple, breezy flow they desired. We proceeded to then scale up our sketches in the kiln with their direct participation. Its no secret that wine definitely helps this process, and this Sunday afternoon was no different.

Making Eric and Kelly’s Glass Countertops.

We took the sketches and made a scaled-up version of the selected design…”Kiln Carving” in the sand. Much like a water colorist, we start with a light outline, then carve our sand bed deeper to refine the design with a series of brush strokes to give us the desired texture. Kelly and Eric watched as I carved the bed…further and further with controlled strokes…taking on the ultimate shape of the textural flow. It is a very interesting process to watch a 2-D pencil sketch become 3-D in a sand bed. Slight adjustments are made during the process as they viewed the artistic shape from many angles to assure that the flow is perfect. Eric took a few strokes on the endpoint of the carving, and Kelly dotted the eye of the hurricane (Hurricane Kelly it is now dubbed). 

Sand bed for glass countertops before carving

Sand bed for glass countertops before carving

Carving Sand bed for glass countertops

Carving Sand bed for glass countertops

Texturing glass countertops

Texturing glass countertops Hurricane Kelly

We then stack low iron glass sheets to make 1.5” thick glass countertops. When illuminated with natural light or enhanced with our LED’s (8,000,000 colors!) it can take on any color you desire. We offer professional and extensive lighting consultation as part of our design service to assure you that your glass countertop or glass high bar will be beautifully illuminated, and we discuss the many options offered.

The kiln is heated to over 1400 degrees Fahrenheit…annealed…cooled. After 5 days, the glass has been fully fused, and has taken on the texture of the kiln carved sand bed. We then use our CNC waterjet and/or diamond saw for precise cutting to size. Extensive hand polishing takes our glass to an optically pure lens quality edge. This is a critical Downing Designs quality distinction which we have elaborated upon before.

We also round over all corners and edges to make sure that the glass is comfortable when you are leaning against it, as well as chip resistant when people hit it with hard objects such as wine bottles, elbows and chairs. 

The result is spectacular. The pictures don’t do justice to the effect this BIG beautiful, glowing bar top has upon its patrons. It’s calming. After a long day, what could be better than to have the perfectly soft, upward glow wash over your cocktails, food, and your significant other. We have described this “Time Machine” effect of this glow previously. It’s real. It’s wonderful. It’s powerful at making everyone look younger. My wrinkles become less obvious. Come see for yourself. 


SUMMARY

We think that spending a lot of money on an expensive stamped, prefabricated piece of glass is just silly, when for the same amount of money you can have an original design, contoured to fit your kitchen or bath room flow. If you want to have an original, Rockstar bar for your home or restaurant, you don’t do it by covering old Beatles songs.

Give us a call to discuss your ideas and we will develop for you a unified design plan for your layout, complete in all respects with lighting, and glass countertop textural flow. You don’t need to be a wine expert to know that anything pairs well with a Downing Designs glass countertops, especially when infused with the likes of Kelly and Eric’s personality…

Thanks to  Eric and Kelly D. for letting me photograph and write about this experience.

The post Making Original Textured Glass Countertops a Case Study: Eric and Kelly appeared first on Downing Designs.


source https://downingdesigns.com/49970-2/